
How Do You Create A Photography Course Outline: Step-by-Step
HOME - GUIDES - COURSE OUTLINE
Learn this step-by-step procedure to understand the procedure of making an online course in photography outline using CreativeMindClass, a free tool that is used by the top photographers.

How to create a course outline in 4 simple steps
Create each lesson plan you'll want to take.
Planning the entire online photography class can seem overwhelming. Sorting through piles of content can lead to confusion about what should be included within the course online. However, a clear plan of the course will ensure that you can manage it.
A course outline is a basic but helpful way to plan your online course's lessons. It's similar to a do-to list of all the videos you'd like to create on the day of filming your course. This usually includes a schedule of specific lessons including notes on content information and the learning outcome So you'll never forget anything.
In this tutorial, you'll learn the pragmatic approach to creating an outline of your course using CreativeMindClass. It is possible to create an outline and reference it on the day of recording to ensure that you don't miss anything. Additionally, you can download an easy template available to aid you to start in just a few minutes.
The steps in this guide
- Check the items you're covering
- Listing the specific learning outcomes
- Utilize the course outline blueprint
- Move from chaotic to well-organized
- Refer to it on the video recording day
1. Write down the topics you're covering
The first step is to list the primary subjects and elements you want to cover. These could be introducing you, showing the best of your projects, an overview of the course and equipment, lighting hands-on project, post-production editing as well as a conclusion. Don't get into specific details at this point. What could you cover in just 3-10 mins of video instruction?
How to do it in CreativeMindClass
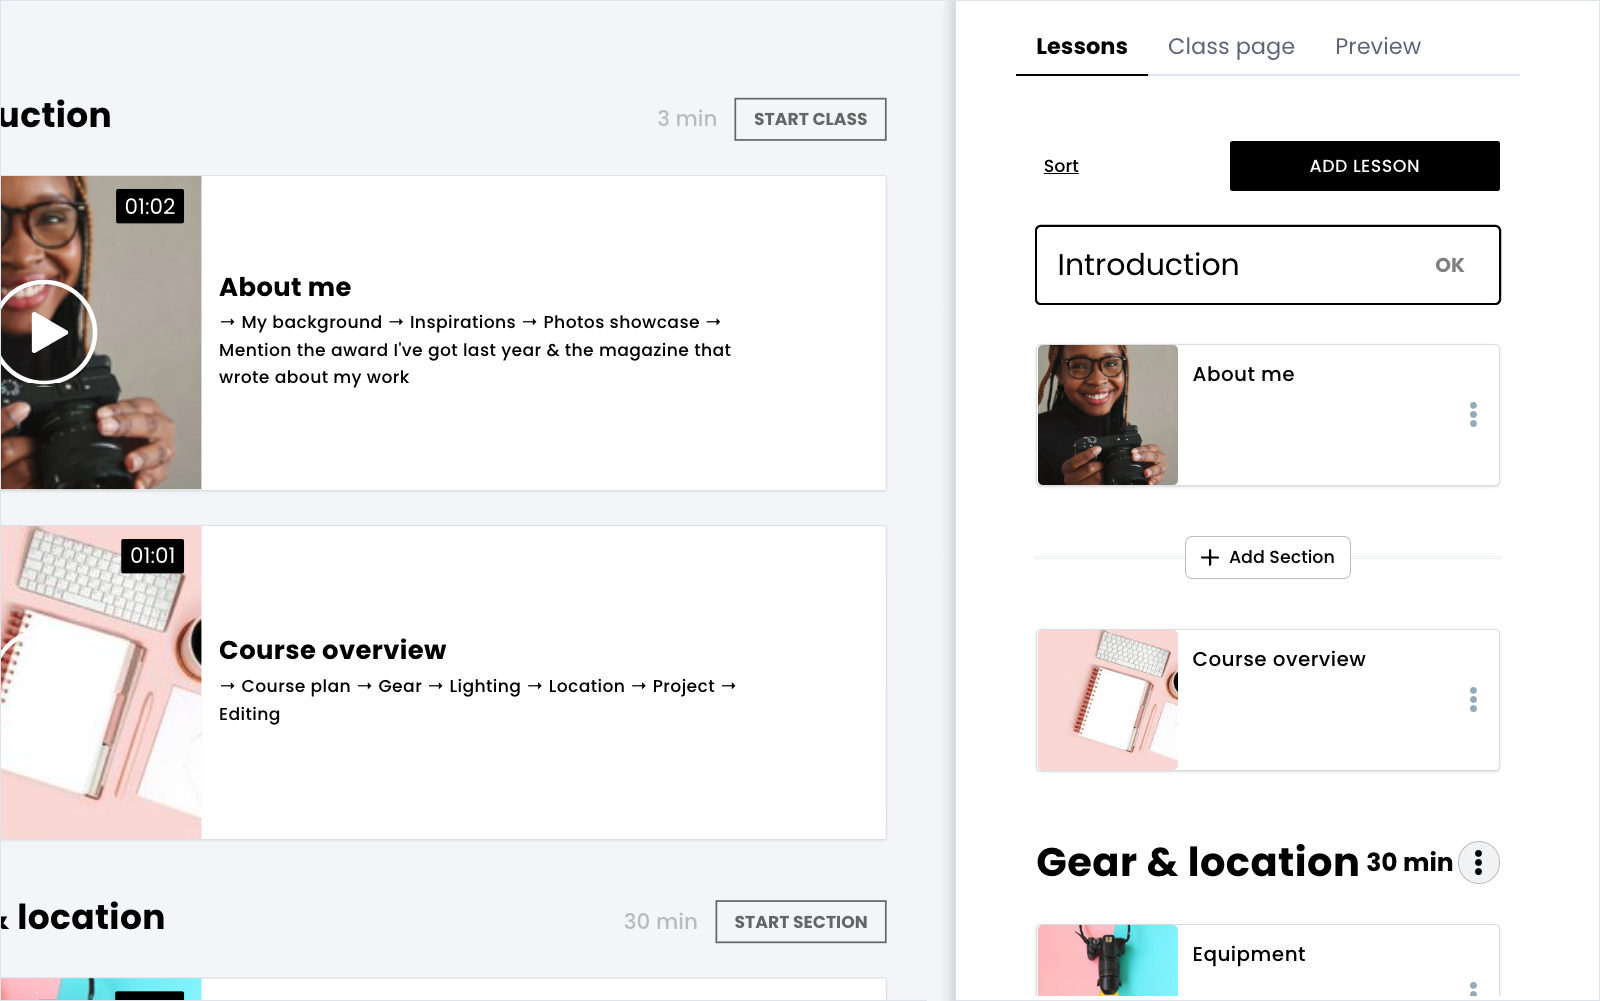
- Create a new class for the outline of your course.
- Click on the LESSONS tab to display it.
- Click the Add LESSON button to create an entirely new lesson.
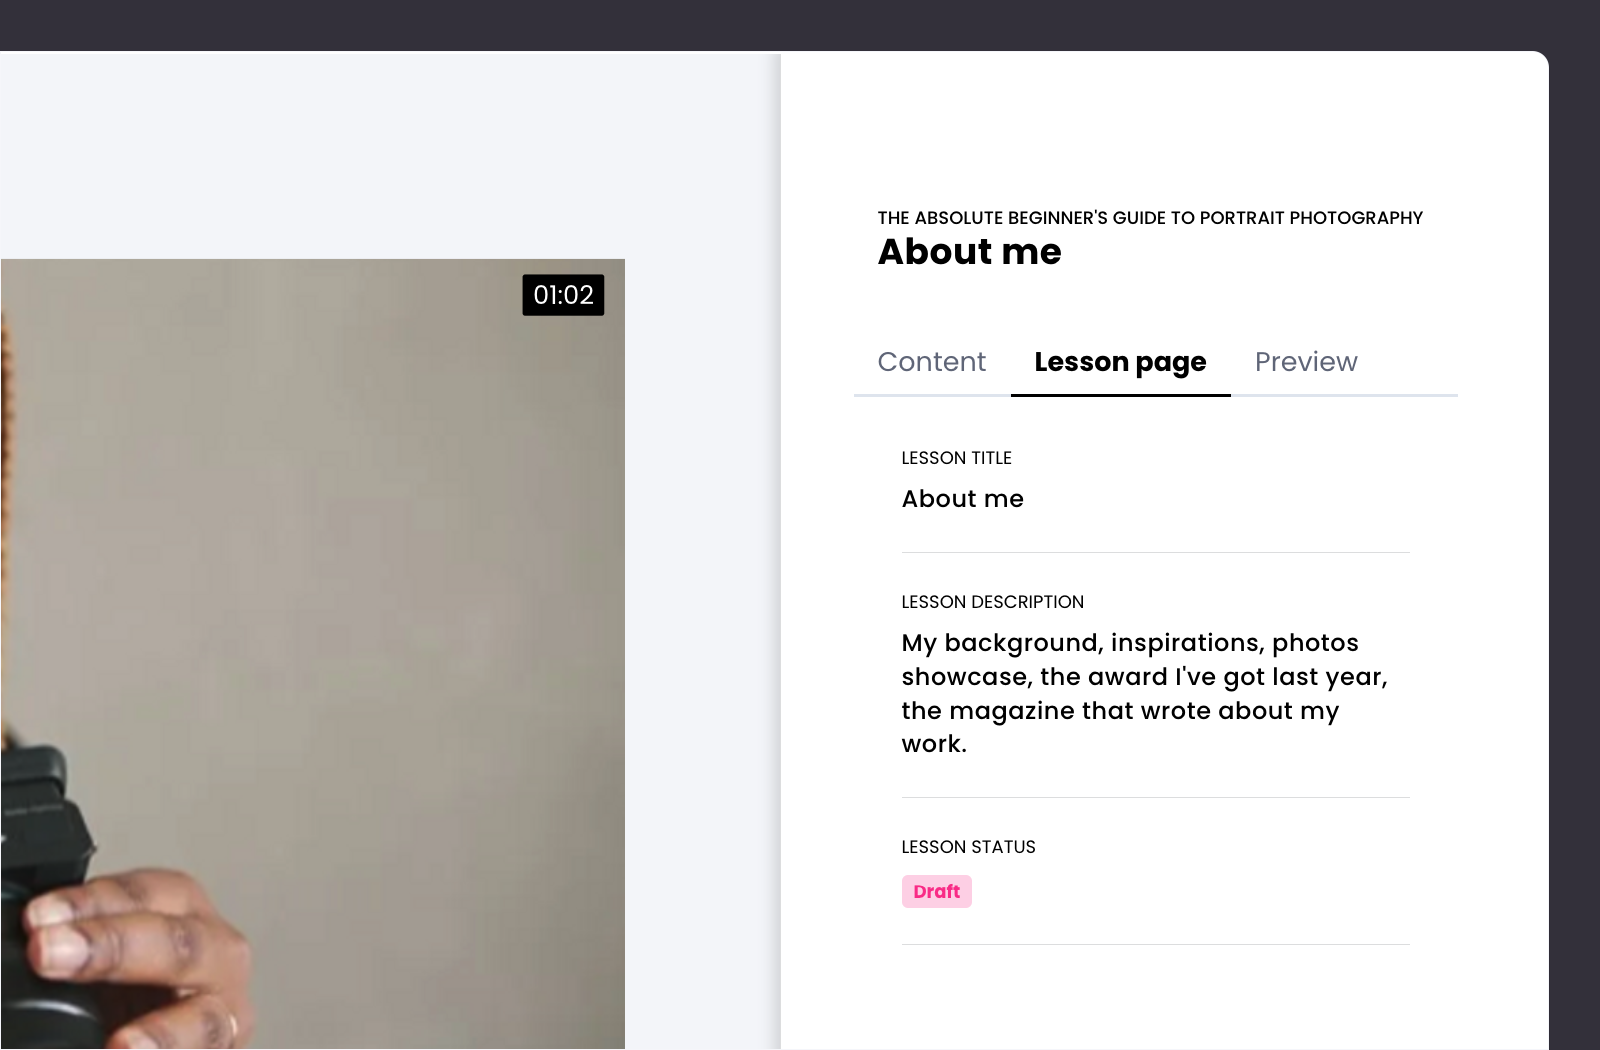
- In Lesson page tab, type LESSON TITLE. For example "About myself".
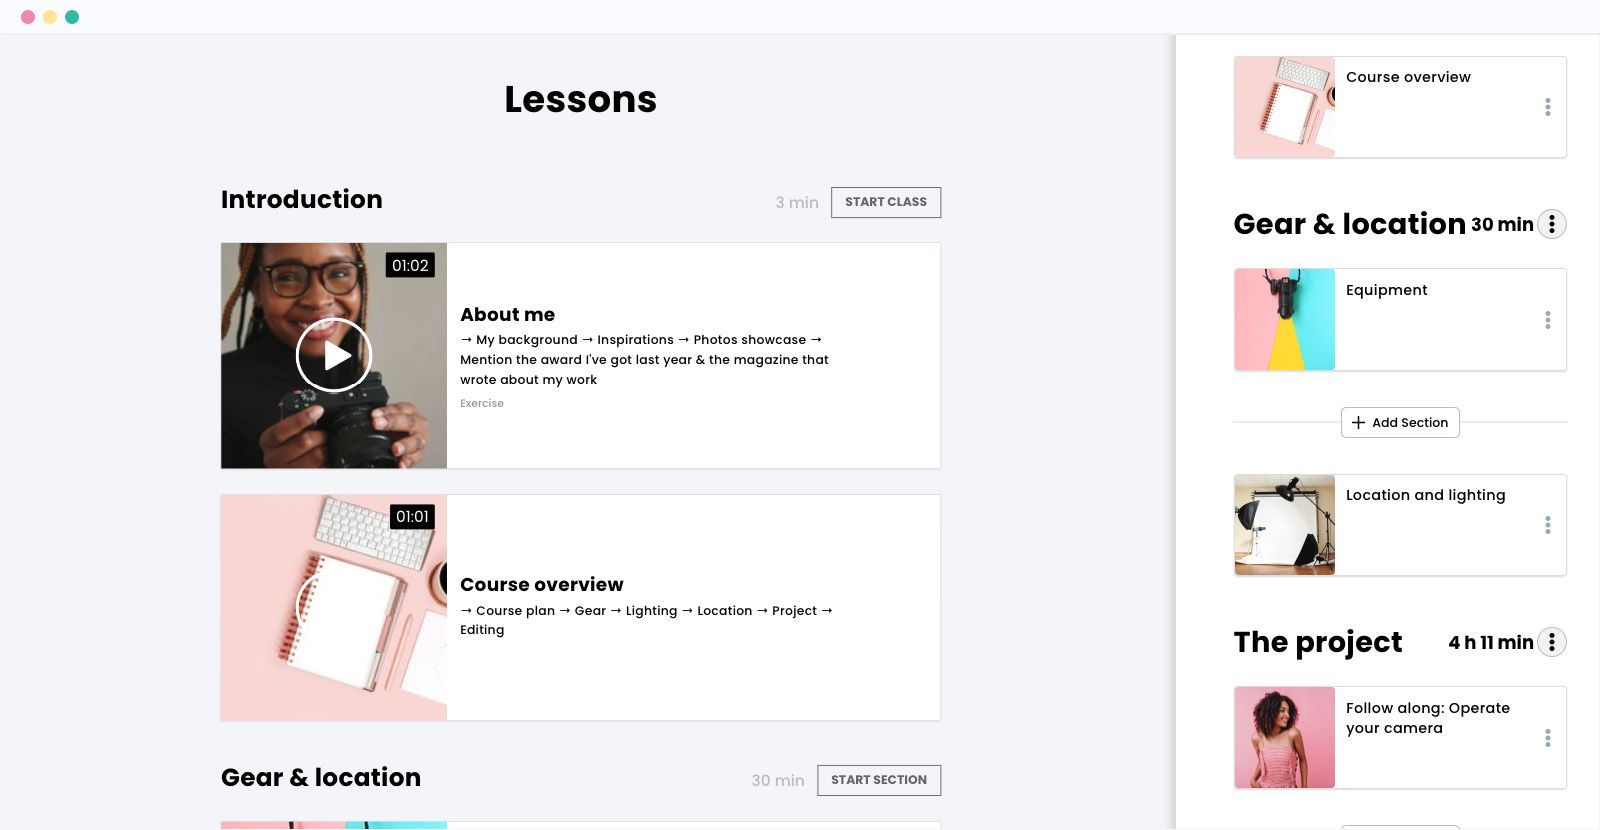
- Incorporate 10-20 lessons into your class. Examples include "Course Overview", "Equipment", "How to master composition", "Editing", "Conclusion"etc.
TIPS: It's better to write down the subject quickly and type the lesson titles without thinking too much. It is possible to change them later.
2. List the individual learning outcomes
This is the heart of the course outline. It's where you list all the important points for every lesson you plan to document. Think about specific learning outcomes and the content that can answer the needs of your students or figure out any gaps that are not being addressed by your competitors.
No worries, no need to be concerned about where to start. Below is an outline you can follow to create the very first lesson of your photography program.
What is it? within CreativeMindClass
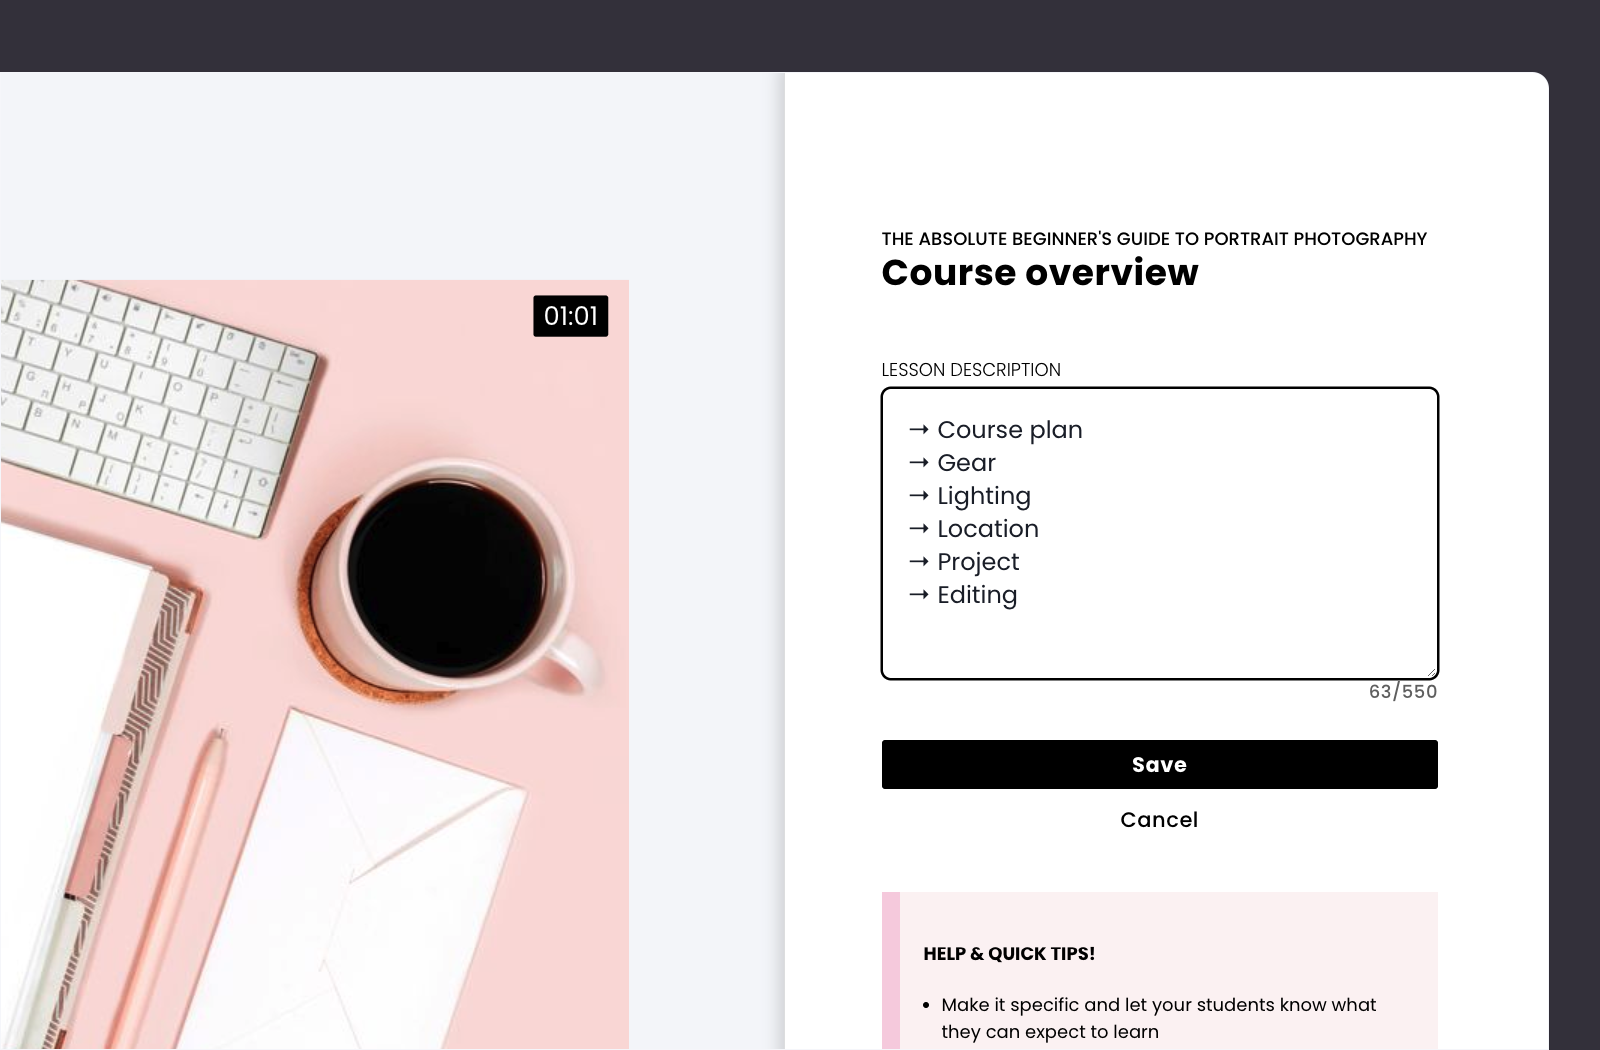
- Navigate to "Course overview" lesson.
- Type LESSON DESCRIPTION to create your lesson outline. For example "Course plan, gear, lighting, location, project, editing ".
3. Make use of the outline for your course
Are you having trouble the creation of your outline for your course? Below we've prepared an easy-to-follow outline with three photography online lesson examples for you for you to get started.
1. Design "About me" lesson outline
Introduce yourself and showcase your best work.
Making your first class is a lot of fun and it doesn't need any planning. Introduce yourself by show your finest work. What would you like your students to know about you as photographer? Do you have something which inspires you? What lead you to making the choice to become photographer? The process helps the students of tomorrow discover the most important aspects of you as photographer.
As you introduce yourself, showcase your photographs examples. What are your favorite images? Do they reflect your personality and the type of work that you perform? Maybe you have any honors or recognition? It's no place for modesty in this article. The powerful self-introduction positions the photographer as an expert and creates a lasting, positive impression.
What is it? in CreativeMindClass
- Create a new lesson.
- Type LESSON DESCRIPTION to create your lesson outline. Example: "My backgrounds, my inspirations and photos, my award I've got this year, and the magazine that wrote about my work".
PRO Tip: Next to introducing your self, display your photos portfolio. Carefully select 8-12 best images.
2. Create "Course overview" lesson outline
Explain what this class will be about, and mention the exercises.
In the course overview, it is a summary of the format of the course, include the project or hands-on project(s), inform whether it includes downloads or material, and create an overview of what students will learn. What the course is about? What gear will they need? These questions make your students more excited about the class, and helps them prepare, and manages their expectations.
How do I get it in CreativeMindClass
- Create a new lesson.
- Type LESSON DESCRIPTION to create your lesson outline. For example "Course plan, shooting project, lighting, location, editing files".
3. Plan out your instructional lessons
Learn and transfer your skills.
It's time to work on lessons that are based on what you want your students to gain from you. The next lesson consider learning objectives and the topics you will cover to meet these objectives. Create your lesson content around clearly defined learning objectives and exercises. Here you define the things your students need to understand and remember and create activities that aid them at every step. What are the things your students require to learn? What are the topics that are covered? What are the hands-on exercises you could create?
How to do it within CreativeMindClass
- Design a new lesson.
- Type LESSON DESCRIPTION to create your lesson outline. Examples include "How you can simplify your scene, What's the rule of thirds? How to use the negative space" (in the "How to master composition"lesson ).
PRO TIP: Write short points and use them as a to-do list during the filming day.
3. From messy to well-organized
You might have created an outline for your course, but discover is now too lengthy or not clear. If you have lots of information to cover, consider breaking your course into sections. Eliminate the lesson without a clear learning outcome. Make sure to take your time in this phase to ensure you don't end up with a long-lasting task.
How to do it in CreativeMindClass
- Click Add Sectionbutton to add a section.
- Type Section title. As an example, you could type "Introduction" section for "About my self" and "Course outline" lessons.
- Add more sections to group your lessons .
Pro Tip: Group the same themes, tips and suggestions into segments. Order the lessons within those segments in the most rational manner.
4. Reference it on the day of recording
In the past, you printed your to-do list to refer to during filming. But these days, a to-do list can be easily accessed via phones or laptops. So, you are able to check off each lesson or modify it as you need.
And you're done!
After your outline of your course has been completed, you can have a plan in place for recording your video. Use the template below to set it up within minutes, or read our full instruction on how to create an online photography class.
Get started with the outline of your photography course
Start for free with CreativeMindClass's simple-to-use templates.
Register for free, with no limit on time
SHARE The link has been copied!
Article was first seen on here